Showing posts with label iphone. Show all posts

Wednesday, July 13, 2011

iOS In App Purchase 學習筆記 (3) : 如何從App Store取得商品資訊

在進入購買階段之前,
我們首先需要告訴使用者這個app提供了哪些商品(product)及這些商品的詳細功能描述.

Store Kit提供了統一的機制讓我們能從App Store獲得所需要的商品資訊.
步驟如下:
1. 產生一個SKProductsRequest的物件, 並且將我們想要取得的商品識別代號(product identifier)設定好.
2. 產生一個實作了SKProductsRequestDelegate的物件, 並將其註冊到SKProductsRequest物件身上.
3. 送出request
4. 當App Store收到這個request後, 它會將結果放在SKProductsResponse的物件中並且通知實作SKProductsRequestDelegate的物件


我們可以利用一個SKProductsRequest帶多個商品識別代號來查詢多筆商品資訊.
App Store會先將各別商品資訊包裝成SKProduct的格式再把它們放在SKProductsResponse裡.

以下是會用到的類別們:

SKProductsRequest

// 設定delegate
@property(nonatomic, assign) id delegate
// 設定一個或多個商品識別代號
- (id)initWithProductIdentifiers:(NSSet *)productIdentifiers


SKProductsRequestDelegate

// 繼承自SKProductsDelegate, 當request發生錯誤時會被呼叫
- (void)request:(SKRequest *)request didFailWithError:(NSError *)error
// 繼承自SKProductsDelegate, 被呼叫即表示跟這個request相關的通訊已經結束
- (void)requestDidFinish:(SKRequest *)request
// 成功取得商品資訊
- (void)productsRequest:(SKProductsRequest *)request didReceiveResponse:(SKProductsResponse *)response


SKProductsResponse

// 無效的產品識別代號
@property(nonatomic, readonly) NSArray *invalidProductIdentifiers
// 有效的商品資訊
@property(nonatomic, readonly) NSArray *products


App Store會將商品識別代號視為無效可能有以下幾個原因:
1. 商品識別代號拼錯
2. 商品被標示為無法販售
3. 在iTunes Connect上對商品的更動尚未被更新到App Store上

SKProduct

@property(nonatomic, readonly) NSString *productIdentifier
@property(nonatomic, readonly) NSString *localizedTitle
@property(nonatomic, readonly) NSString *localizedDescription
@property(nonatomic, readonly) NSLocale *priceLocale
@property(nonatomic, readonly) NSDecimalNumber *price


對於商品的多國語言設定需在iTunes Connect上完成.

Sunday, June 26, 2011

在iTunes Connect上看懂你的sales report

標題寫的好像很厲害不過這邊要主要介紹的只會有product type啦XD

app上架之後,
每天早上打開電腦的第一件事就從開gmail變成開itunes connect啦!
Sales and Trends頁面會先以Dashborad的方式來瀏覽.
主要就是可以讓你用長條圖或是折線圖得方式來了解銷售量.
不過我覺得這個模式蠻不容易看的,
如果有多個app的話會被累積在一起算很難瞭解各別app的銷售情況.

所以我都是用Sales模式來看,
就可以看到下面這個表格.

可以用右邊的Apple ID來大致區別不同的app,
也可以從Store看出大概是哪些國家的人裝了你的app,
如果發現征服了新的國家就會自我感到良好這樣 囧

不過我最主要會看的是Type那欄.
Type是Product Type的簡寫,
是用來告訴你這是什麼類型的交易(是初次下載還是更新等等)

以下就是Type各種可能的值囉.


Type IdentifierCategoryDescription
1Free or Paid AppsiPhone and iPod Touch
7UpdatesiPhone and iPod Touch
IA1In AppsIn-App Purchase
IA9In AppsIn-App Subscription
1FFree or Paid AppsUniversal Apps
7FUpdatesUniversal Apps
1TFree or Paid AppsiPad Touch
7TUpdatesiPad Touch


Thursday, April 14, 2011

iOS In App Purchase 學習筆記 (2)

如何提供product給使用者?
使用者選擇product並付款後. 你的app就要能讓使用者享受他所購買的東西. 提供product的方法有兩種: (1) 內建product模式 (2) 伺服器提供product模式. 要用哪種方式則須視product類型來作決定.

(1) Built-in Product Model - 內建product模式
顧名思義, 這種模式是已經預先把功能放在app中, 在使用者付費之後app就會解除鎖定. 這種模式的優點是能快速的讓使用者享受他所購買的功能. 通常nonconsumable(非消耗性)的product會採用這種方式.

流程:
1. app讀取product清單 (放在plist會比寫在程式碼有彈性)
2. app向App Store取得product名稱/描述等相關資訊
3. App Store回傳product資訊
4. app呈現product資訊供使用者選擇
5. 使用者決定購買某product
6. app向App Store發出付費要求
7. App Store處理付費要求並回傳交易紀錄
8. app依據交易紀錄來判斷是否完成付款, 成功的話就將功能解除鎖定

解除鎖定最簡單的方式是修改app的偏好設定. 偏好設定會在使用者同步iOS裝置的時候與app一起備分. 你的app可以在收到成功的購買紀錄後提示使用者主動備分.

(2) Server Product Model - 伺服器提供product模式
在這個模式中, 你需要另外提供伺服器讓app在使用者付款後由此得到product. 這種模式常見於subscriptions(訂閱), services(服務)和 content(資料內容)等. Store Kit並未規範標準流程, 你必須自行定義app和伺服器之間溝通方式. 此外, 個別使用者的識別及購買product的對應也必須要自己處理.

流程:
1. app向伺服器取得product清單 (詢問伺服器會比放在plist有彈性)
2. 伺服器回傳支援的清單
3. app向App Store取得product名稱/描述等相關資訊
4. App Store回傳product資訊
5. app呈現product資訊供使用者選擇
6. 使用者決定購買某product
7. app向App Store發出付費要求
8. App Store處理付費要求並回傳交易紀錄
9. app將交易收據上傳至伺服器
10. 伺服器紀錄此交易
11. 伺服器向App Store詢問此交易是否有效
12. App Store回傳結果
13. 伺服器判讀交易結果
14. 成功的話會讓使用者享受他所購買的東西

在這個模式中, app必須保證訂閱類型的product能被使用者回復使用.

iOS In App Purchase 學習筆記 (1)

什麼是In App Purchase?
In App Purchase是一套讓你能在app中賣東西的機制.

In App Purchase能賣什麼東西?
In App Purchase所能販賣的東西被稱為product, 以下是四種支援的product種類:
- Content(內容): 任何能被另外新增app中的東西, 像是電子書, 進階的角色或裝備
- Functionality(功能): 解除鎖定某些已在app中但目前無法使用的功能
- Services(服務): 依使用次數來收費的服務
- Subscriptions(訂閱): 提供有使用期限的內容或服務

以下是無法在app中賣的東西:
- 實體商品或實體服務
- 虛擬貨幣
- 帶有色情/仇恨/暴力/賭博等等性質的東西

product的類型屬性
- Consumable(消耗性的): 每次使用都要付費, Service就是屬於此類
- Nonconsumable(非消耗性的): 付費後所有登入同一個帳號的裝置均可永久使用(由Store Kit提供支援)
- Auto-renewable subscriptions(自動更新訂閱): 同樣也是付費後所有登入同一個帳號的裝置均可使用(由Store Kit提供支援), 但購買後有使用期限, App Store會自動在使用期限到了之後提示使用者重新購買, 如果使用者不同意將會無法繼續使用. 你的程式需有一套機制驗證subscription的有效性來決定使用者是否能繼續使用.
- Subscriptions(訂閱): 類似Auto-renewable subscriptions, 但所有事情都得要自己處理, 需自行提示期限已到讓使用者重新購買, 也需自己建構傳遞subscription到所有裝置的機制

In App Purchase的概念
你的app首先需透過Store Kit向App Store取得product資訊並在app中呈現出來, 如果使用者同意購買某個product, Store Kit將會導引使用者完成付款. 最後你的app需透過解除功能鎖定或是另外下載的方式讓使用者能享受他所買的東西.


如何註冊product?
所有你想要在app中販賣的product都必須要先透過iTunesConnect在App Store註冊. 以下是註冊時需要提供的資訊:
- reference name: iTunes Connect內部使用的顯示名稱
- product ID: 用來跟App StoreStore溝通 (ex:取得資訊, 購買..)
- display name: 在app中顯示的名稱, 支援多國語言
- description: product的細部說明, 支援多國語言
- price: 價格 (Tier 1/2/3....)
- type: 類型 (Consumable, Nonconsumable, ....)
- other metadata: 視類型而定

ref:
(1) In App Purchase Programming Guide
(2) StackOverflow: Any (early) experiences with auto-renewable subscriptions for iOS

Monday, March 14, 2011

How to create user account for In App Purchase testing?

Apple provides a sandbox environment for developers to test app without creating real financial transactions. The sandbox environment returns transactions as if payments were processed successfully.

The sandbox environment uses special iTunes Connect accounts that are limited to In App Purchase testing. You cannot use your normal iTunes Connect account to test your store in the sandbox.

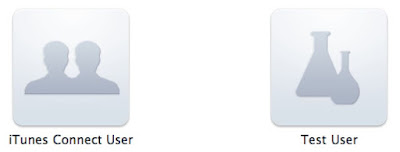
1. Log into iTunes Connect and go to page "Manage Users"

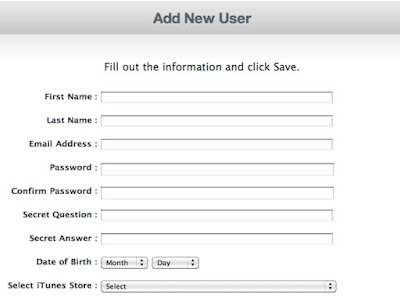
2. Select "Test User", then click "Add new user" on next page

3. Fill in all information, then click "Save"
- email address of the test account can't be associated with any other Apple account
- don't log into a production environment with test account, otherwise the account credentials will become invalid and cannot be used as a test account again
- email address doesn't need be valid
- password should contain at least one number and capital character

4. All test accounts will be listed here


ref: iTunes Connect Developer Guide

Tuesday, March 08, 2011

How to upload binary to iTunes Connect?

1. Login to iTunes Connect and go to page "Manage Your Applications"
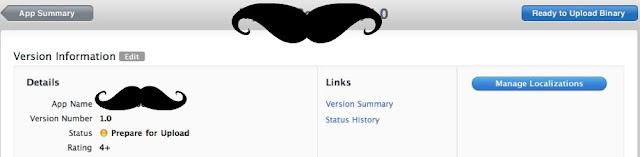
2. Click button "Ready to Upload Binary" if the status of your app is "Prepare for Upload"

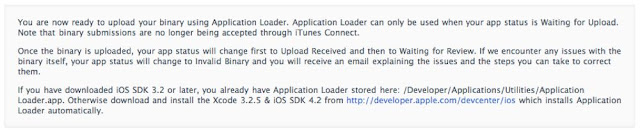
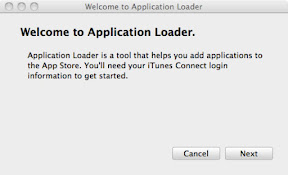
3. iTunes Connect guide you to upload binary with "Application Loader"
- if you have iOS SDK 3.2 or later, you can locate "Application Loader" in folder /Developer/Applications/Utilities
- otherwise, you can download it through link provided on this page

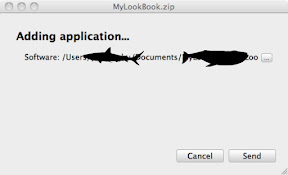
4. Launch "Application Loader", click "Next"

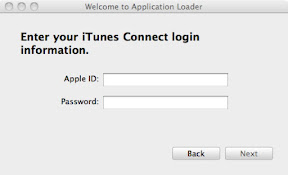
5. Enter iTunes Connect id/password, click "Next"

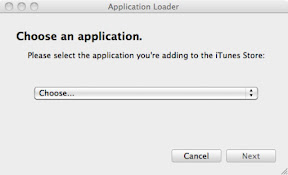
6. Select the application you are adding binary for, click "Next"

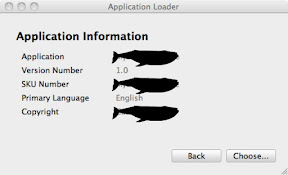
7. Information of application you selected will be displayed on the dialog, click "Choose"

8. Select binary file, click "Send"
- the file need to be build for distribution and are compressed in zip format

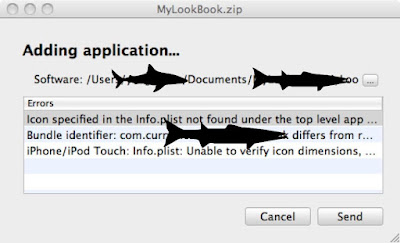
* If there's something wrong with the binary file, error messages will be listed below.
Here are some common errors:
- binary file is not signed correctly
- application icon is missing or the format is incorrect (Guide for setting application icon)

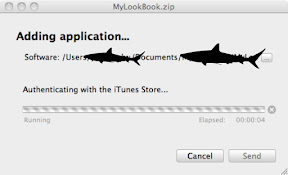
9. Authenticating with iTunes Store

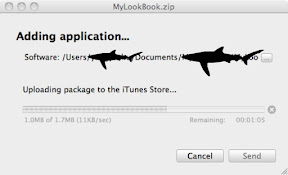
10. Uploading binary file

10. Upload complete, back to the Manage your Applications page in iTunes Connect to view the status of your app
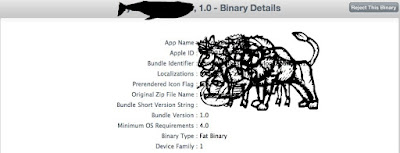
- if the binary is not final version and you don't want it to be put in review queue, you can click "Reject This Binary"
- you can resubmit the binary anytime

Wednesday, December 22, 2010

How to integrate iAd into your iPhone app

STEPS

1. add iAd framework to your project

(1) Right click Frameworks: Add\Existing Frameworks…
(2) Select "iAd.framework"

(3) "iAd.framework" has been added to your project


2. add ADBannerView to your view
ADBannerView *iAd = [[ADBannerView alloc] initWithFrame:CGRectMake(x, y, w, h)];
iAd.delegate = self;
[self.view addSubview:iAd];
iAd.hidden = YES;
3. implement ADBannerViewDelegate
- (void)bannerViewDidLoadAd:(ADBannerView *)banner {
banner.hidden = FALSE;
NSLog(@"bannerViewDidLoadAd");
}

- (BOOL)bannerViewActionShouldBegin:(ADBannerView *)banner willLeaveApplication:(BOOL)willLeave {
NSLog(@"bannerViewActionShouldBegin");
return YES;
}

- (void)bannerViewActionDidFinish:(ADBannerView *)banner {
NSLog(@"bannerViewActionDidFinish");
}

- (void)bannerView:(ADBannerView *)banner didFailToReceiveAdWithError:(NSError *)error {
banner.hidden = TRUE;
NSLog(@"didFailToReceiveAdWithError, error:%d ", [error code]);
}

Why it's important to implement ADBannerViewDelegate?

To detect the status of loading advertisement.
In some situation, ads might not be available.
That's why view controller hide ADBannerView after iAd been created in step 2.
When the advertisement has been successfully loaded (- (void)bannerViewDidLoadAd:(ADBannerView *)banner is called),
the view controller then make ADBannerView visible.
If advertisement is not available, ADBannerView will never show up.
Therefore, user will not see a blank area on ADBannerView.

Here's the image that illustrates ADBannerView is added to a view and advertisement is successfully loaded.


If user touch ADBannerView, a popup view will show up and details of the advertisement will be displayed.
After user close the popup view by touching (X), he will go back to the app directly.


reference:
1. Technical Q&A: Hiding iAd banners when ads are not available
2. iAd programming guide
3. How to integrate iAd into your iPhone app include details about:
- solution for setting target sdk < 4.0
- display iAd according to current orientation
- put iAd in table view

Thursday, December 02, 2010

How to support facebook single sign-on in your iphone app

PREPARATION
1. download latest facebook sdk for iOS
2. register your application with facebook: http://www.facebook.com/developers/createapp.php
3. set name and picture for your application (for user to have an idea about the application they are going to authenticate)

HOW TO INTEGRATE FACEBOOK SDK WITH YOUR PROJECT

1. add source code under folder FBConnect to your project
2. include the FBConnect headers in your code
#import "[RELATIVE_PATH]/FBConnect.h"
3. init Facebook object
Facebook* facebook = [[Facebook alloc] init];

WHAT IS SINGLE SIGN-ON?
The new authentication mechanism that users no longer have to re-enter their credentials to authenticate each app if valid session already exists Facebook official app or Safari.

HOW SINGLE SIGN-ON WORKS?
It relies on iOS's fast app switching. Your app trigger FBApp/Safari for authentication. After the user grants or declines the authorization, the FBApp/Safari redirects back to your app, passing the authorization token, expiration, and any other parameters the Facebook OAuth server may return.

SINGLE SIGN-ON FLOW


SUPPORT SINGLE SIGN-ON
1. bind your app to a URL scheme corresponding to your Facebook application ID by modifying .plist file of your app

2. catch FBApp/Safari redirection by implementing this in your app's main AppDelegate
- (BOOL)application:(UIApplication *)application handleOpenURL:(NSURL *)url{
[facebook handleOpenURL:url];
}


START AUTHENTICATION
1. call authorize method
[facebook authorize:{YOUR_APP_ID} permissions:{PERMISSIONS} delegate:self];


HOW TO DISABLE SINGLE SIGN-ON?
1. in Facebook.m authorize method
[self authorizeWithFBAppAuth:NO safariAuth:NO];


ref: https://github.com/facebook/facebook-ios-sdk/